Live Class Streaming with Zoom
Host your live class with zoom meetings directly from Teachify LMS. Use an activity where all your students can participate simultaneously. It’s real-time, highly interactive, and very social.
Installation
After purchase and download the Live Class for the Teachify LMS, you should find a directory name LiveClass after unzip the plugin. Upload it to the Teachify LMS root > app > Plugins directory. Your Directory structure should look like below.

After upload the plugin, activate it by following steps.
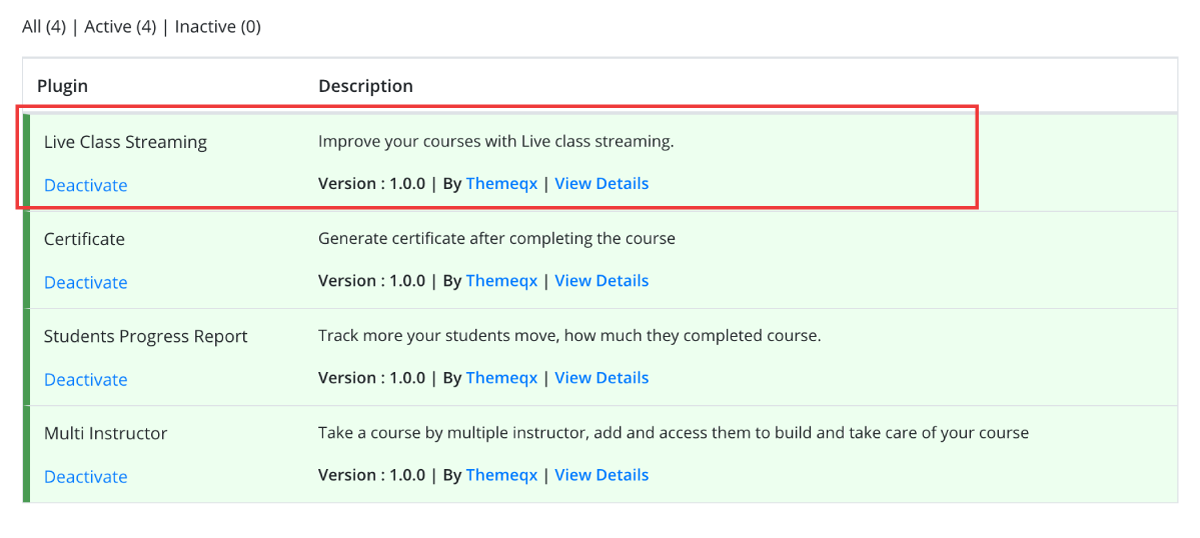
- Log in to Teachify LMS as Admin.
- Go to Admin Panel > Plugins > All Plugins.
- Locate the Live Class Streaming
- Click Activate.
Your Plugin should be activated within a moment. After activation, you will see green background of the activated plugin.
How to Use
To start live class using zoom app, follow these steps described below:
- Create a Zoom account
- Obtain API keys through creating an APP at zoom marketplace
- Connect Teachify LMS with your zoom account
- Create zoom meeting
- Configure course live class schedule
- Operate live video class
- Join Live Class (Student)
1. Create a Zoom Account
Create your zoom account following this link:
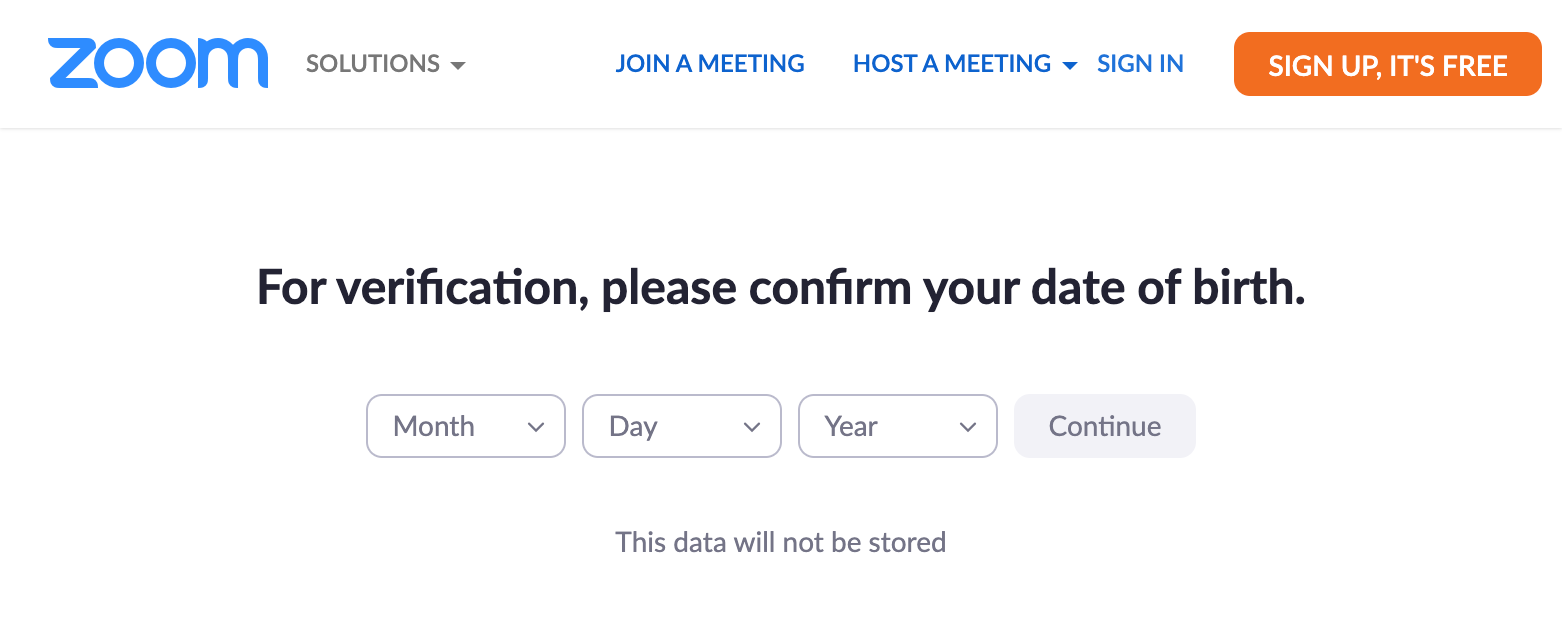
Place your birthday for verification. it will take you to the next step.
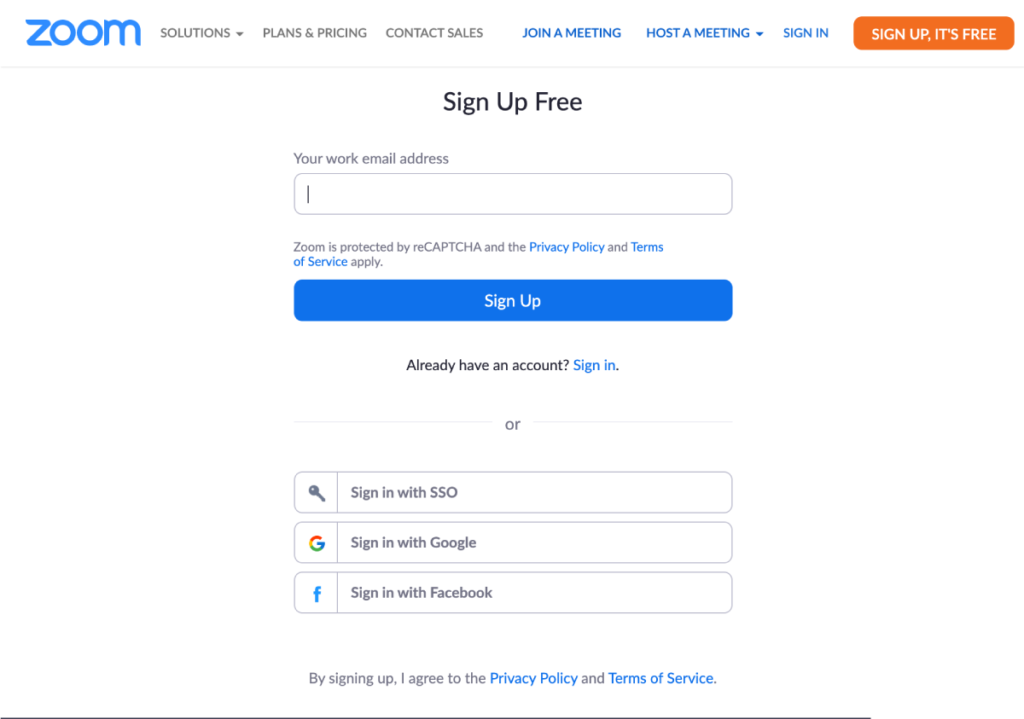
Write your E-Mail address and click Sign Up. Fill up the form with given instruction and complete account creation by verifying your email address. After verifying your E-Mail Address, go to your account page and complete the account signup process.
If you already have a zoom account, just ignore this step and login to your zoom account.
2) Obtain API keys
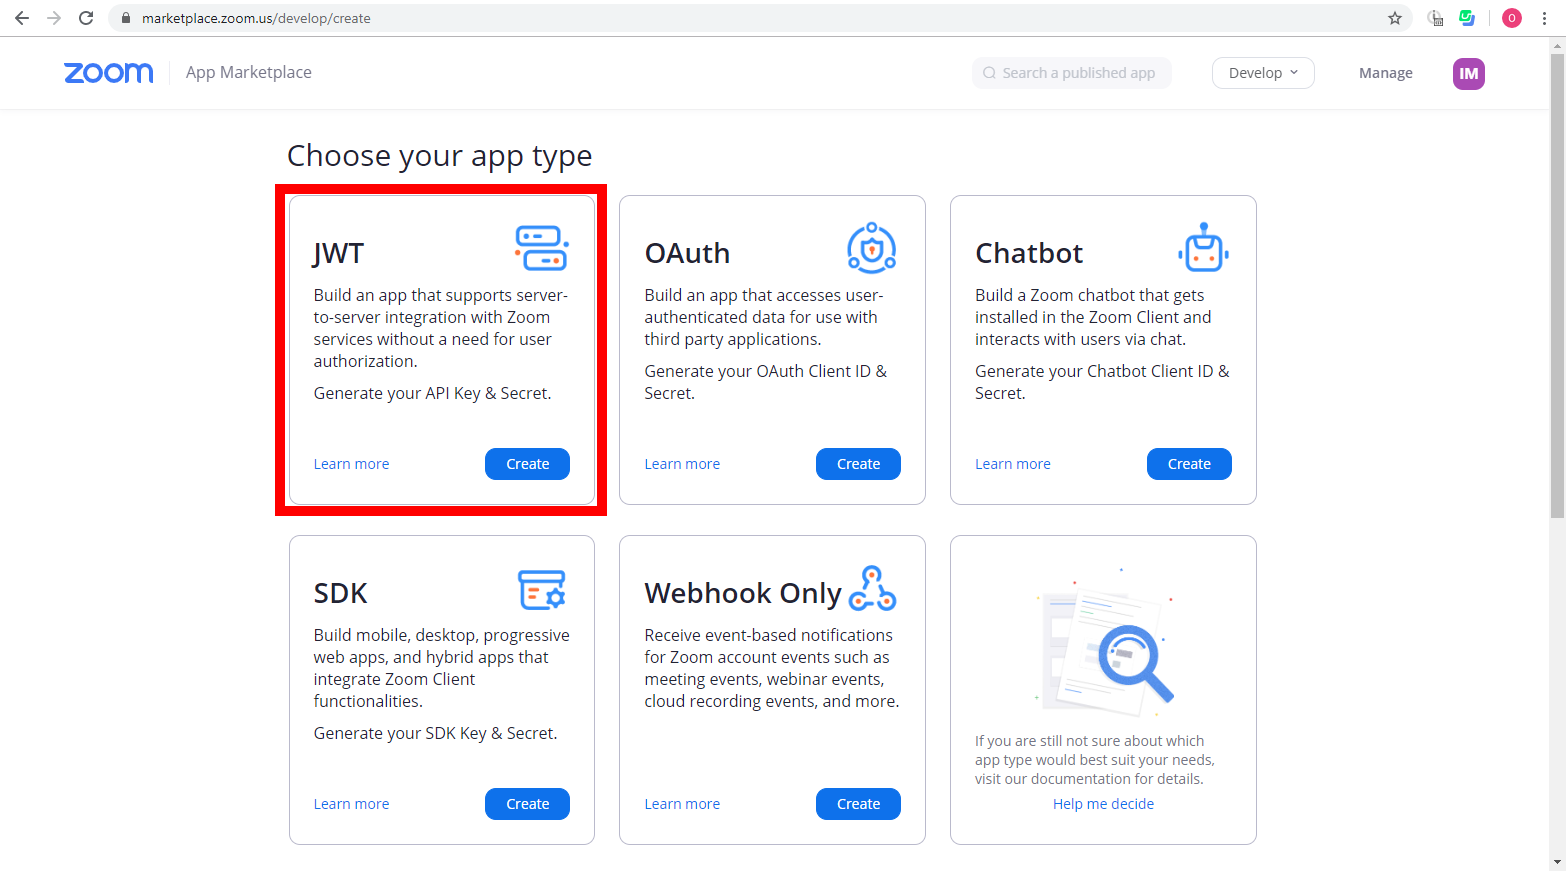
In this step, you have to create a new JWT app to generate your API keys. To do this, navigate to the link below and accept the terms of service: https://marketplace.zoom.us/develop/create (make sure you are logged in at Zoom.us)
Now select JWT and press “Create”
Give it a name and create the app.
Now fill up the app information form as instructed and then click “Continue”:
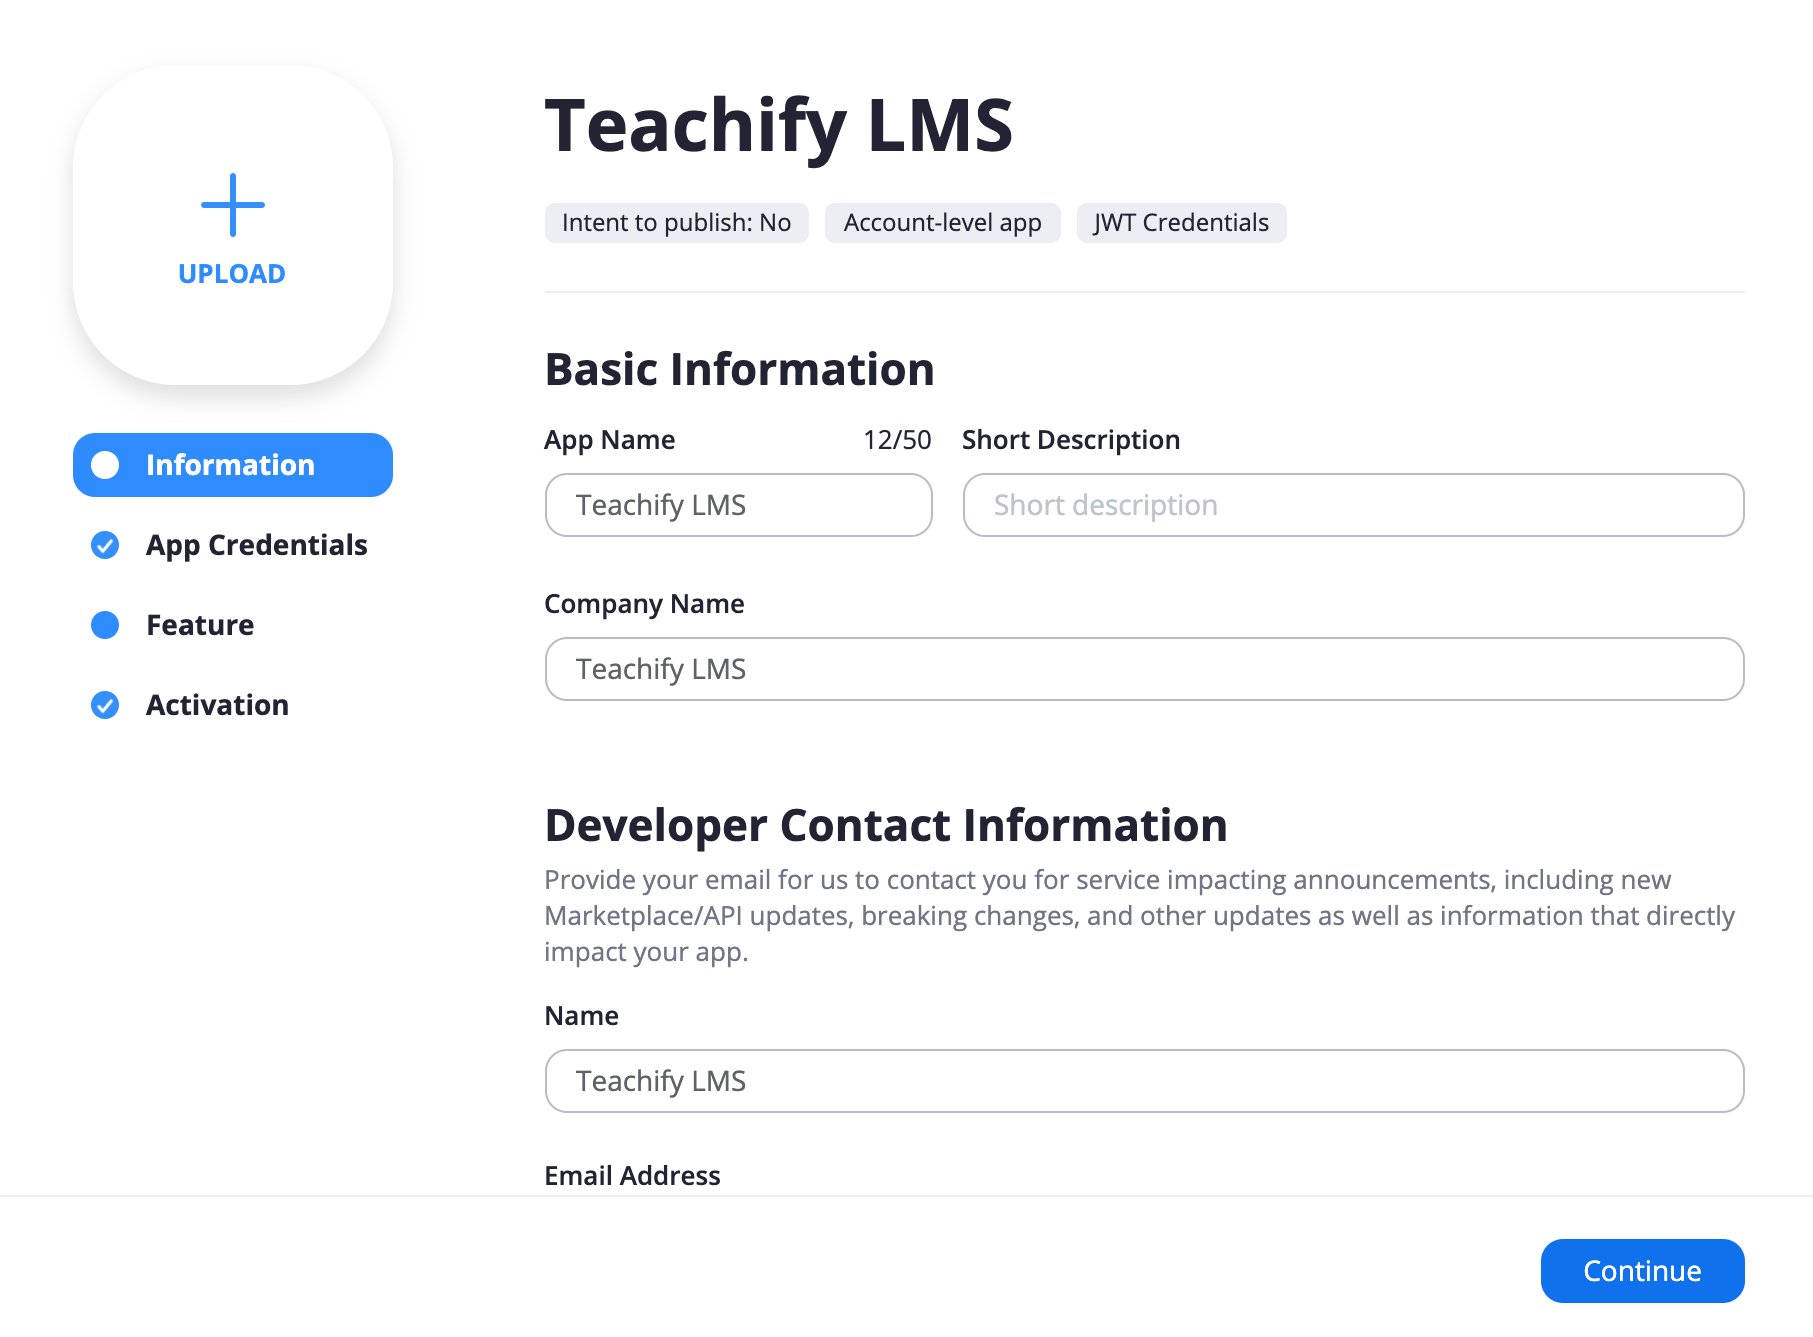
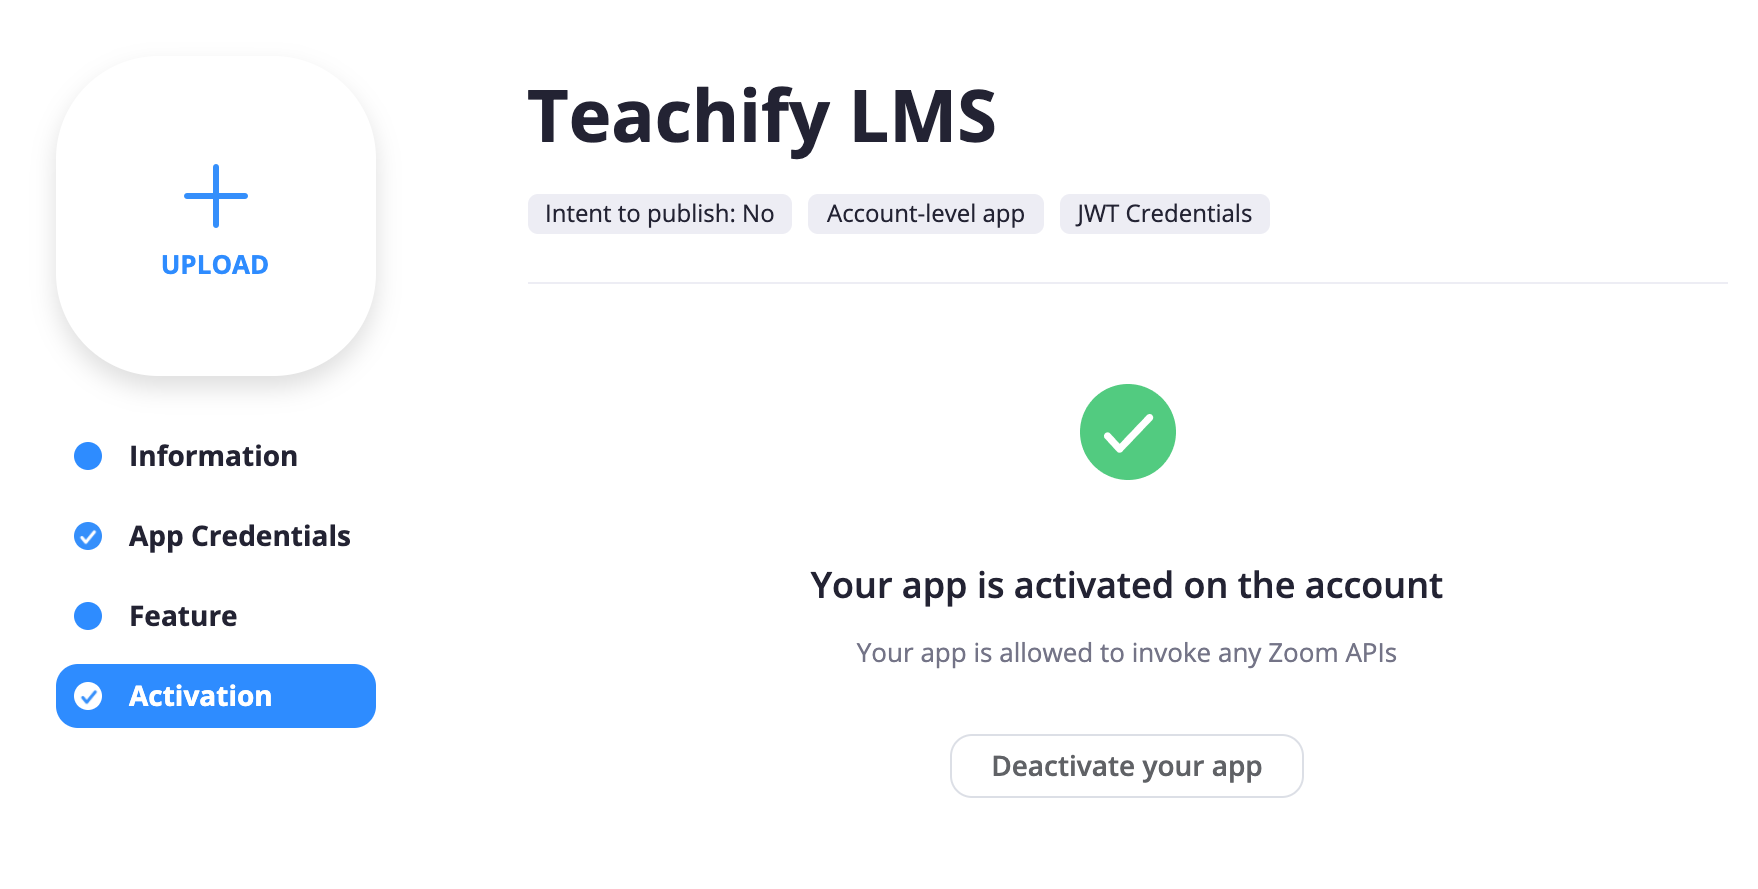
Skip the next steps and go to “Activation”. You will see the confirmation screen of your app creation.
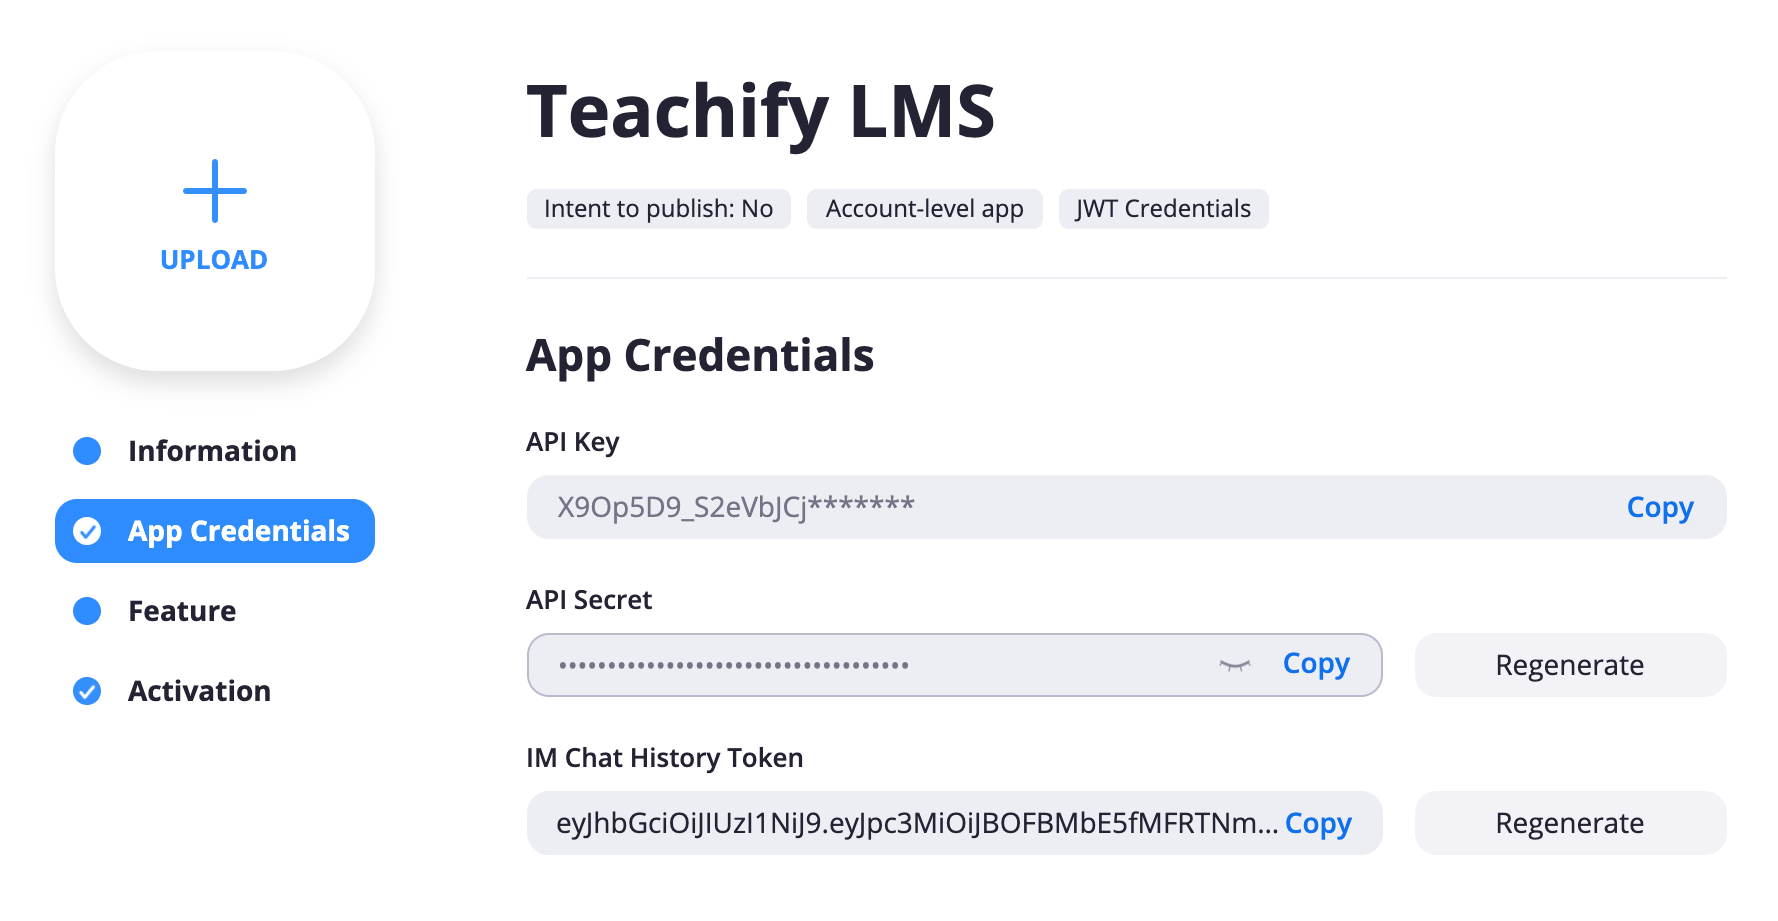
Click to App Credentials Tab. Here you will get the API key and the Secret key, those will be required in the next step.
3) Connect Teachify LMS with your zoom account
Click the Live Class Settings menu from the administrator menu area. and place your Zoom api key and Zoom Secret key which just got from the Zoom App Credential tab.
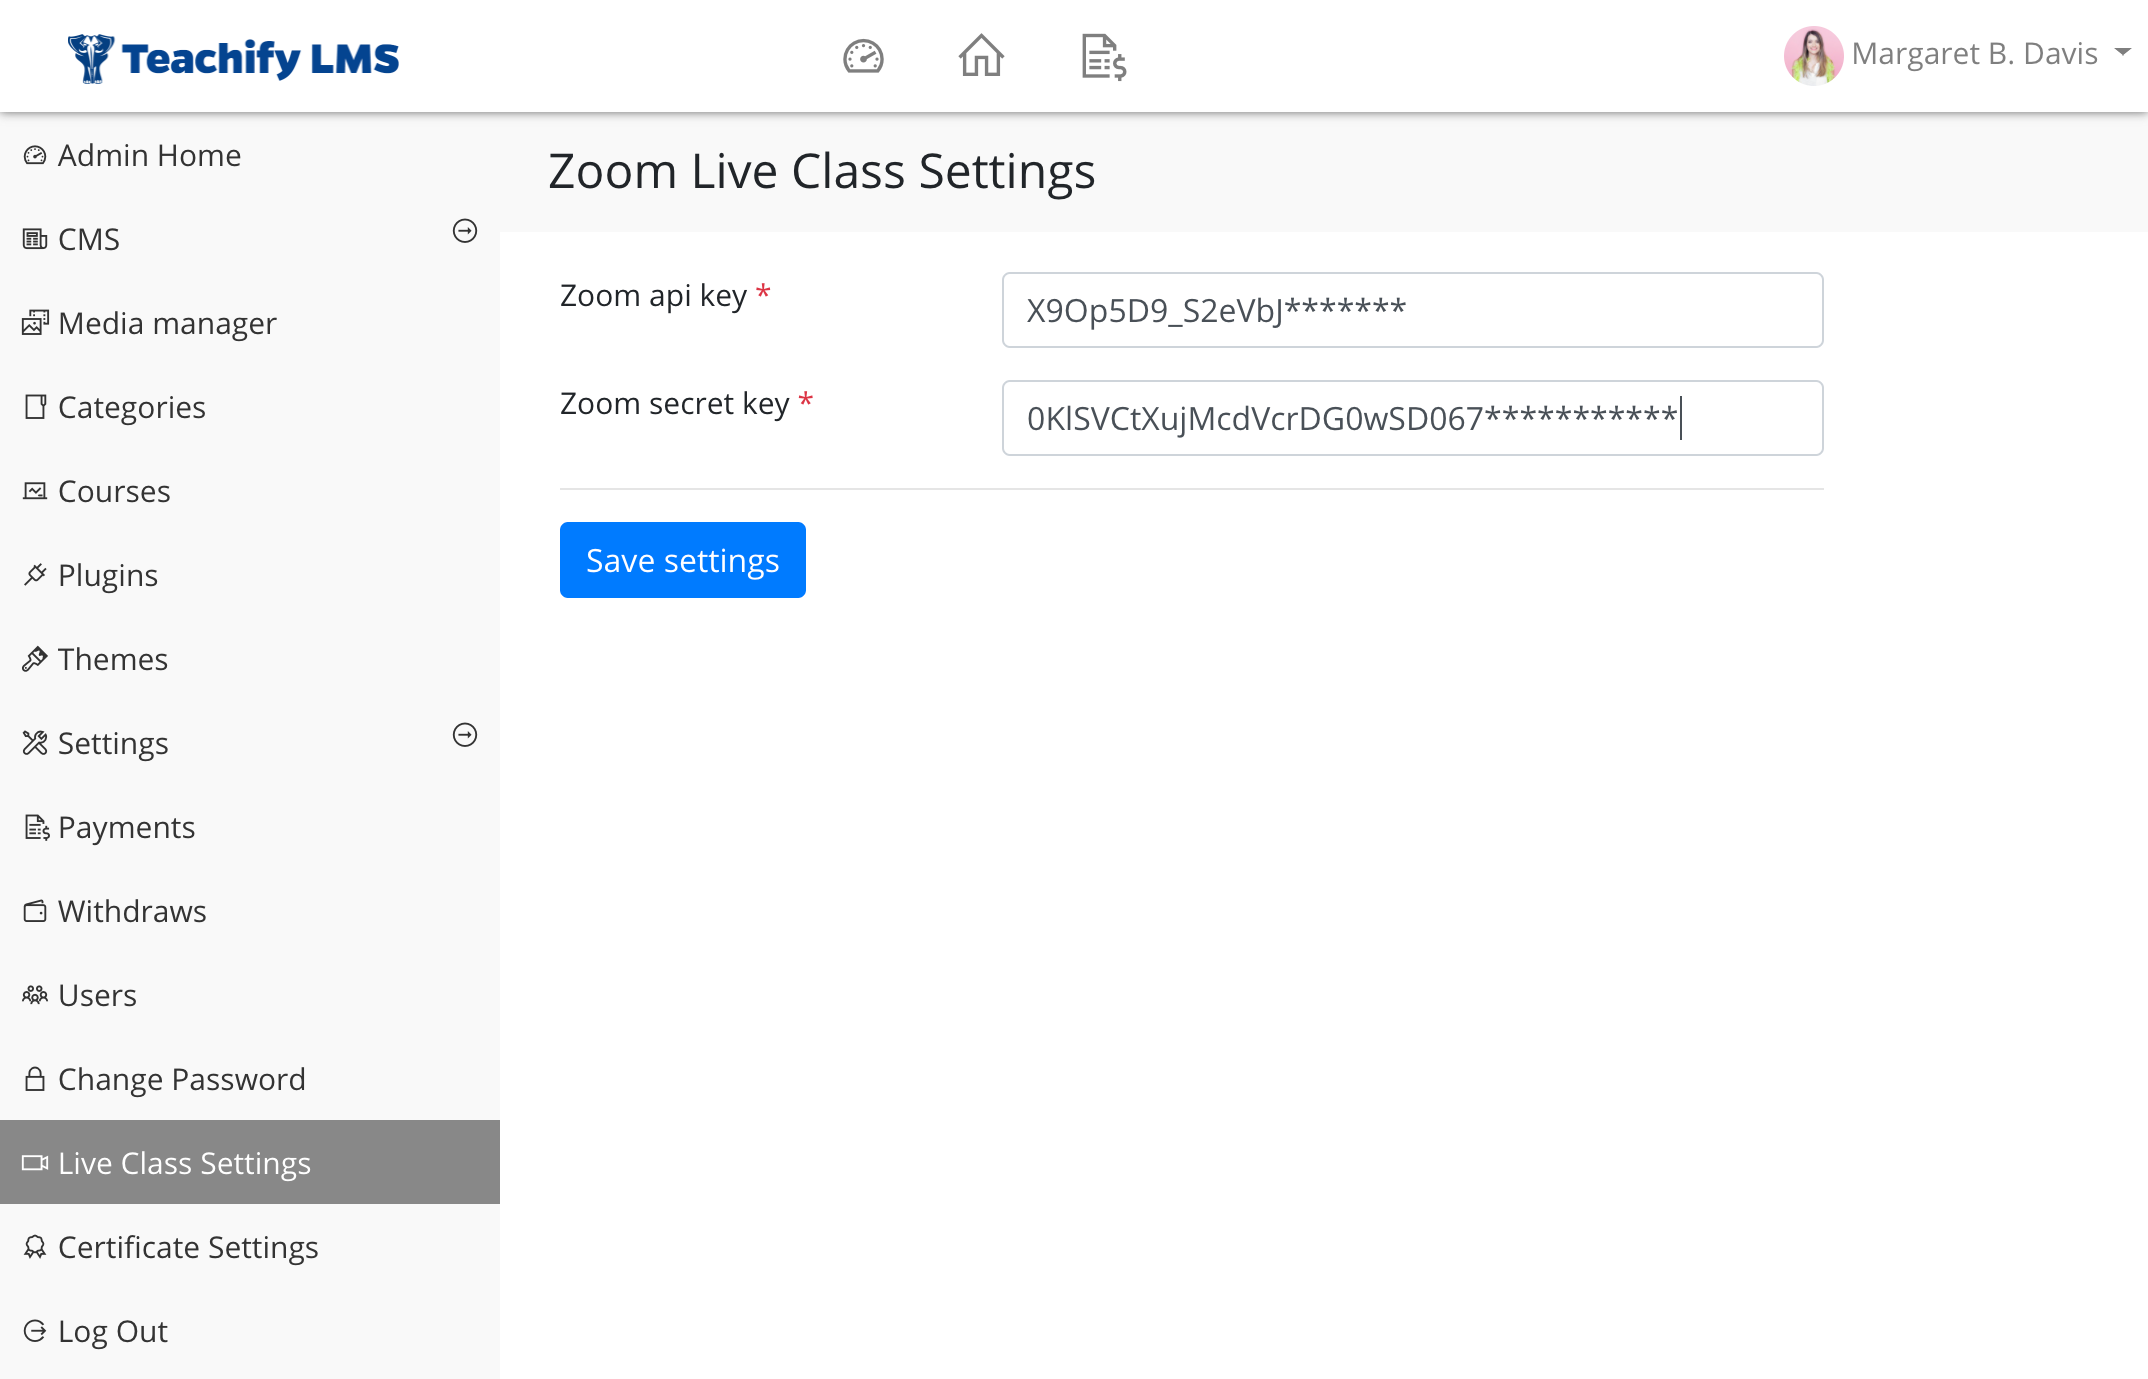
Your Teachify LMS is now connected with Zoom, and you are ready to host live class.
4) Create zoom meeting
You can create a zoom meeting in any of the following ways:
- Browser ( in zoom website)
- Desktop app ( Windows, Mac, Linux )
- Mobile app ( iOS, Android )
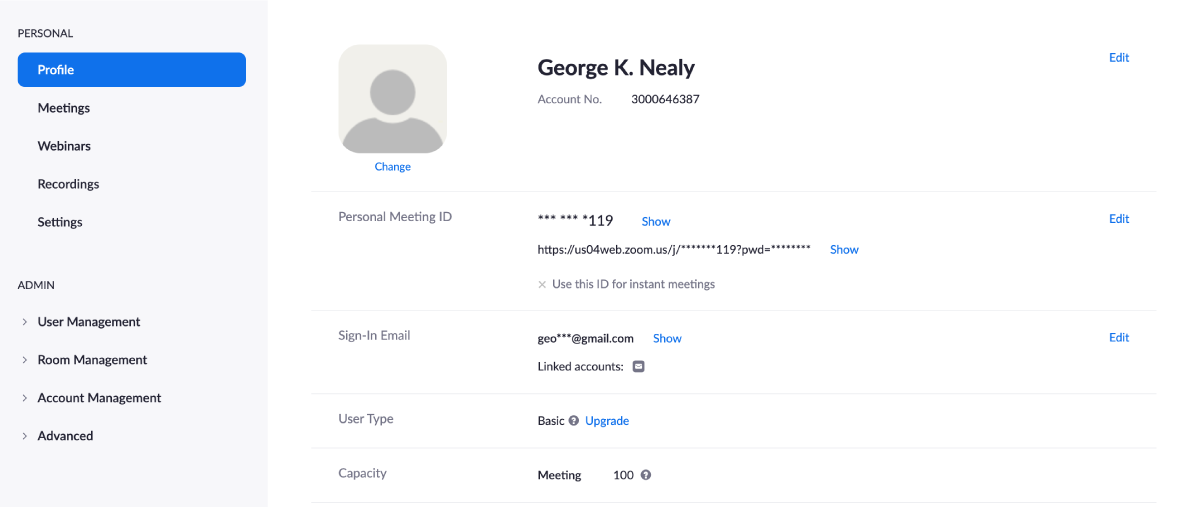
In any medium, after the creation of the zoom meeting, retrieve the meetings id, password.
If you do NOT have the Zoom app installed, go to zoom.us and select “Host a Meeting” to start the installation. If you DO have the App installed, see below.
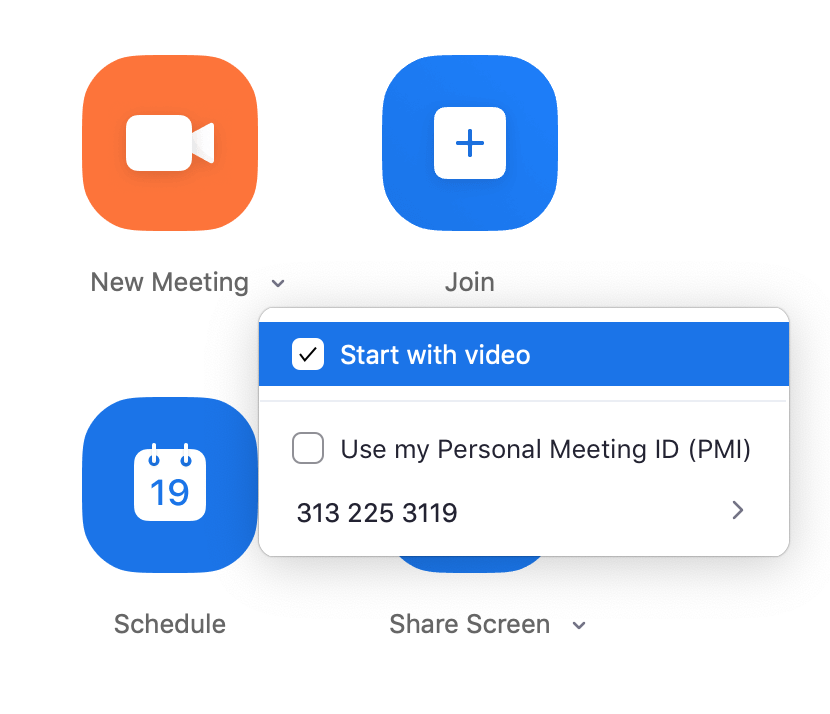
Open your Zoom app on your desktop and click Sign In.
Log in using the E-mail and password that you have created, or with Gmail, Facebook, or log in with SSO.
Click the arrow down and select Start with the video, then click New Meeting to start an instant meeting.
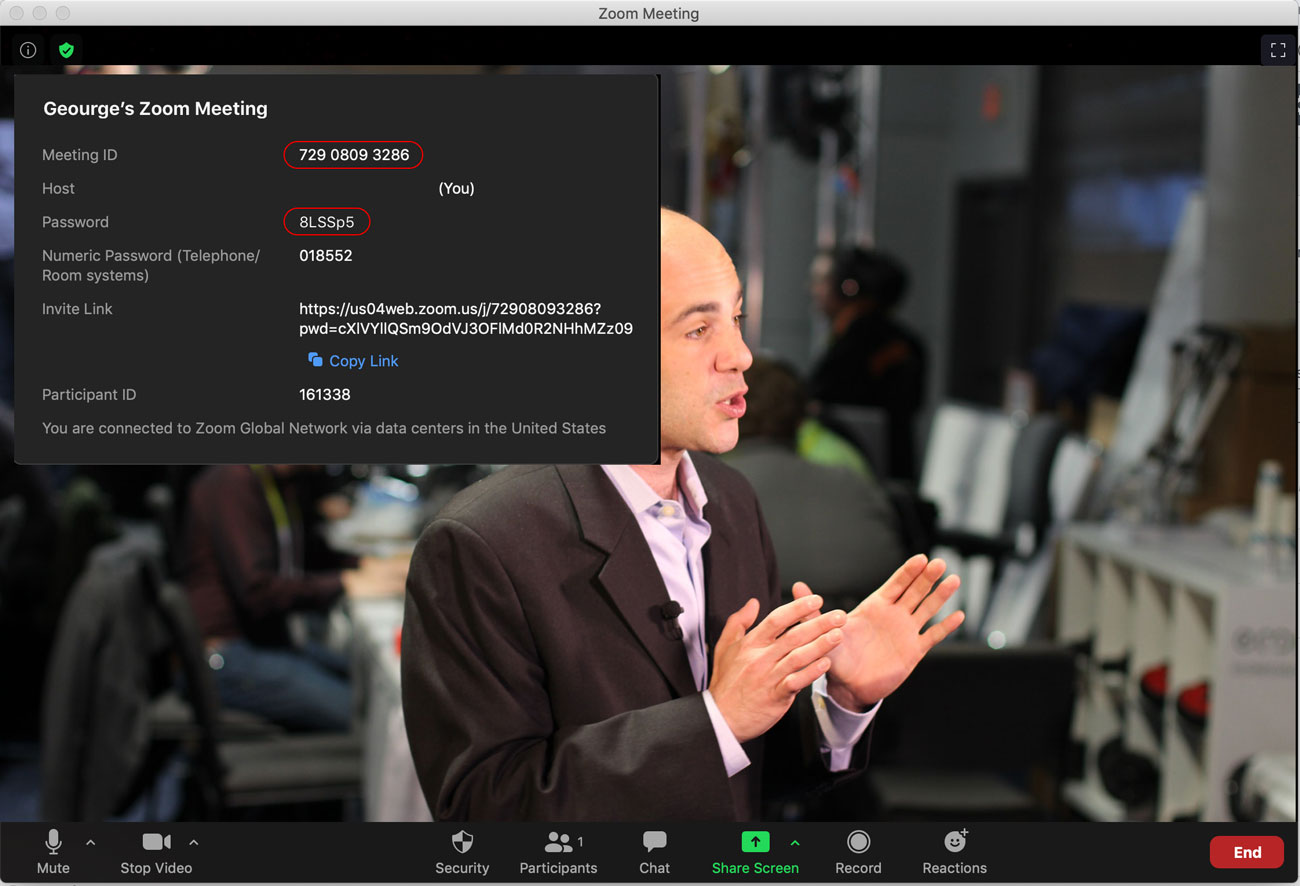
Find the Meeting ID, password during a meeting:
PC or Mac
The Meeting information, including the Meeting ID, Password can be viewed by clicking the info button in the top corner of the meeting window:
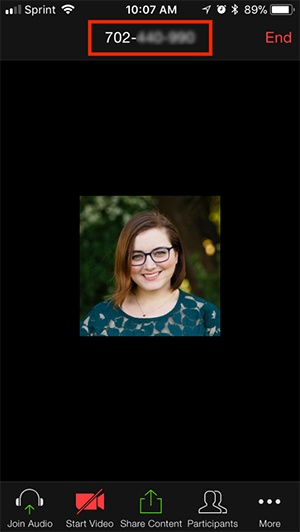
Find the meeting ID on Android or iOS
Tap on the screen to display the Meeting ID at the top. Note: If invite participants to the meeting, the 10 to 11-digit number in the invitation URL is the meeting ID.
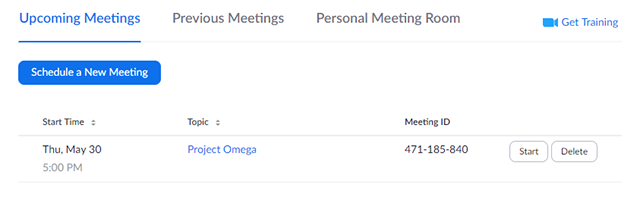
Locating the Meeting ID for a scheduled meeting
You can view, start or delete your upcoming or previous meetings IDs in the Meetings page in the Zoom web portal.
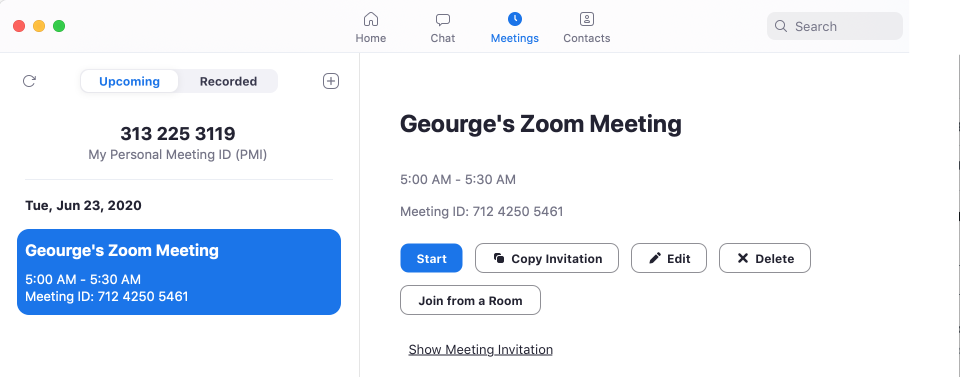
Find the Meeting ID Password for a scheduled meeting from PC or Mac App
Open the Zoom app from the MAC or PC, locate click the meetings tab. You will see all of your meetings with ID here.
5) Configure course live class schedule
From the course edit page, go to Live tab
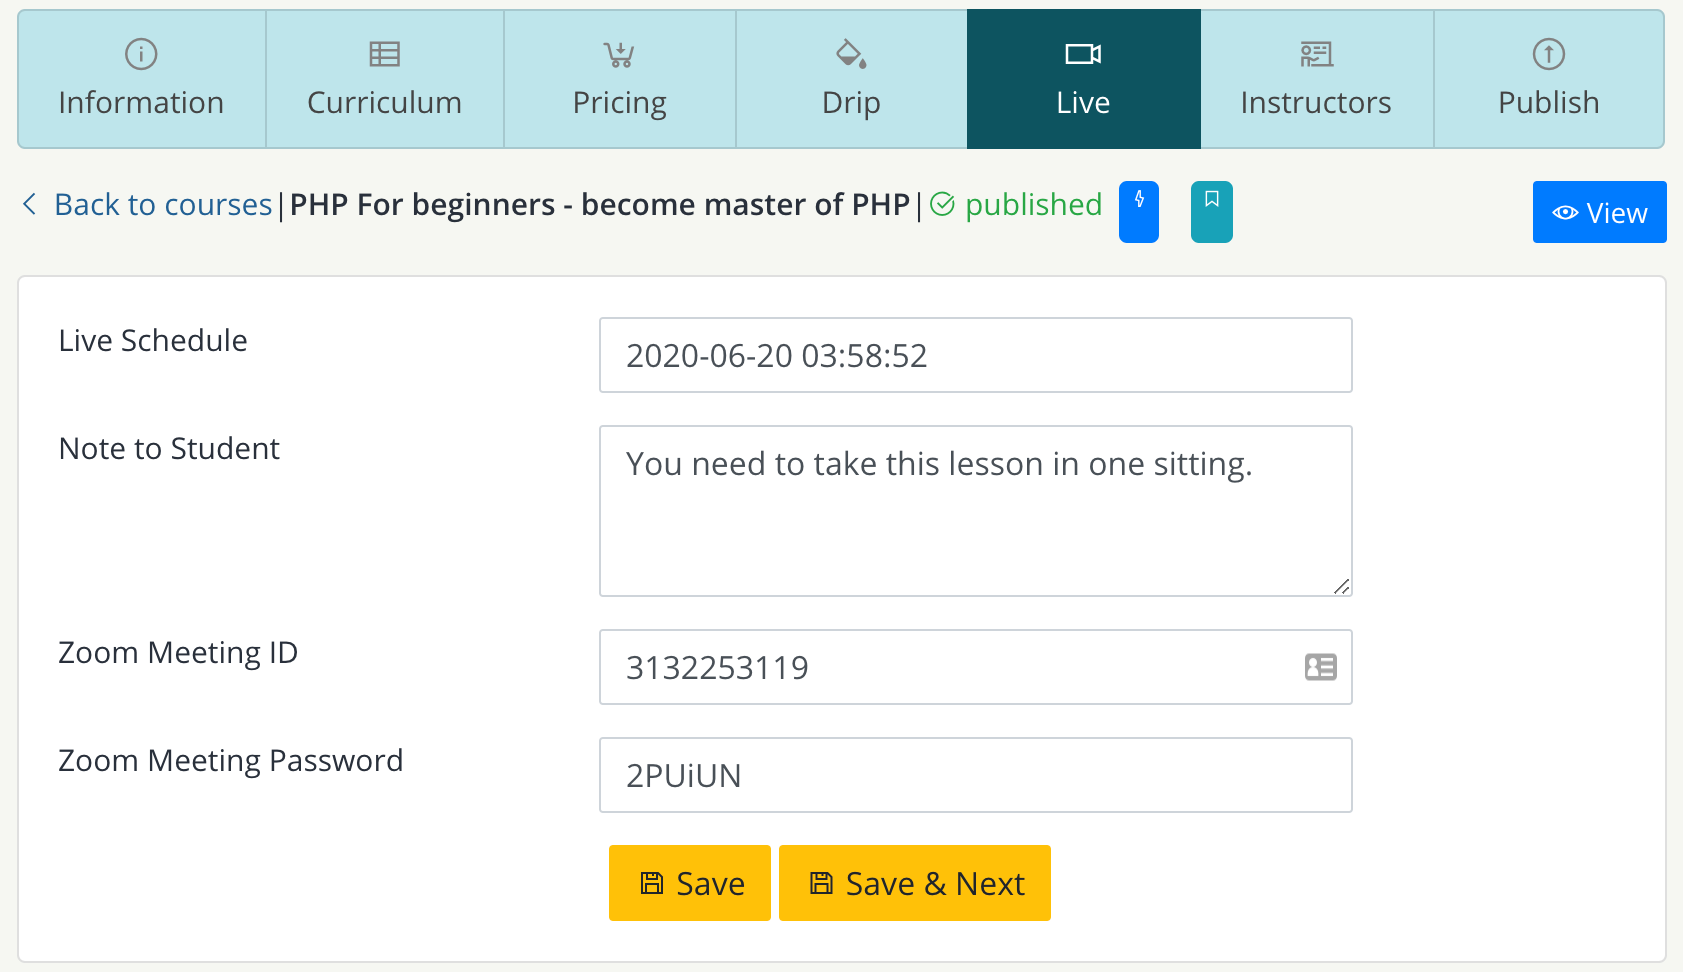
Configure and provide all information at here, Schedule Date, note to student, Zoom Meeting ID, Zoom Meeting Password. Click the save button to schedule the live class.
6) Operate live video class
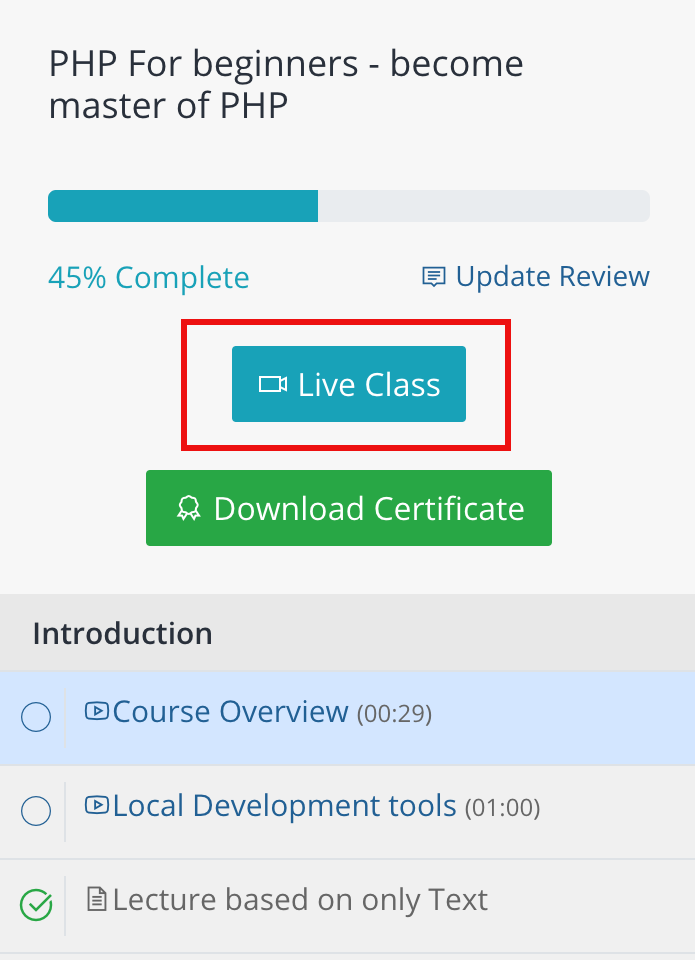
Once you have completed all those previous steps, you are now ready to start your live class. You need to start the meeting from your zoom app before the schedule is announced to your students. After finishing everything. Students will see Live Class Button during taking the course.
When students arrive at the live video page to join. They will see live page behavior based on the scheduled time. If students arrive before the scheduled time, they will see a simple beautiful page with countdown containing Live Class information. They can join the live class by clicking Join Live Class Now button.
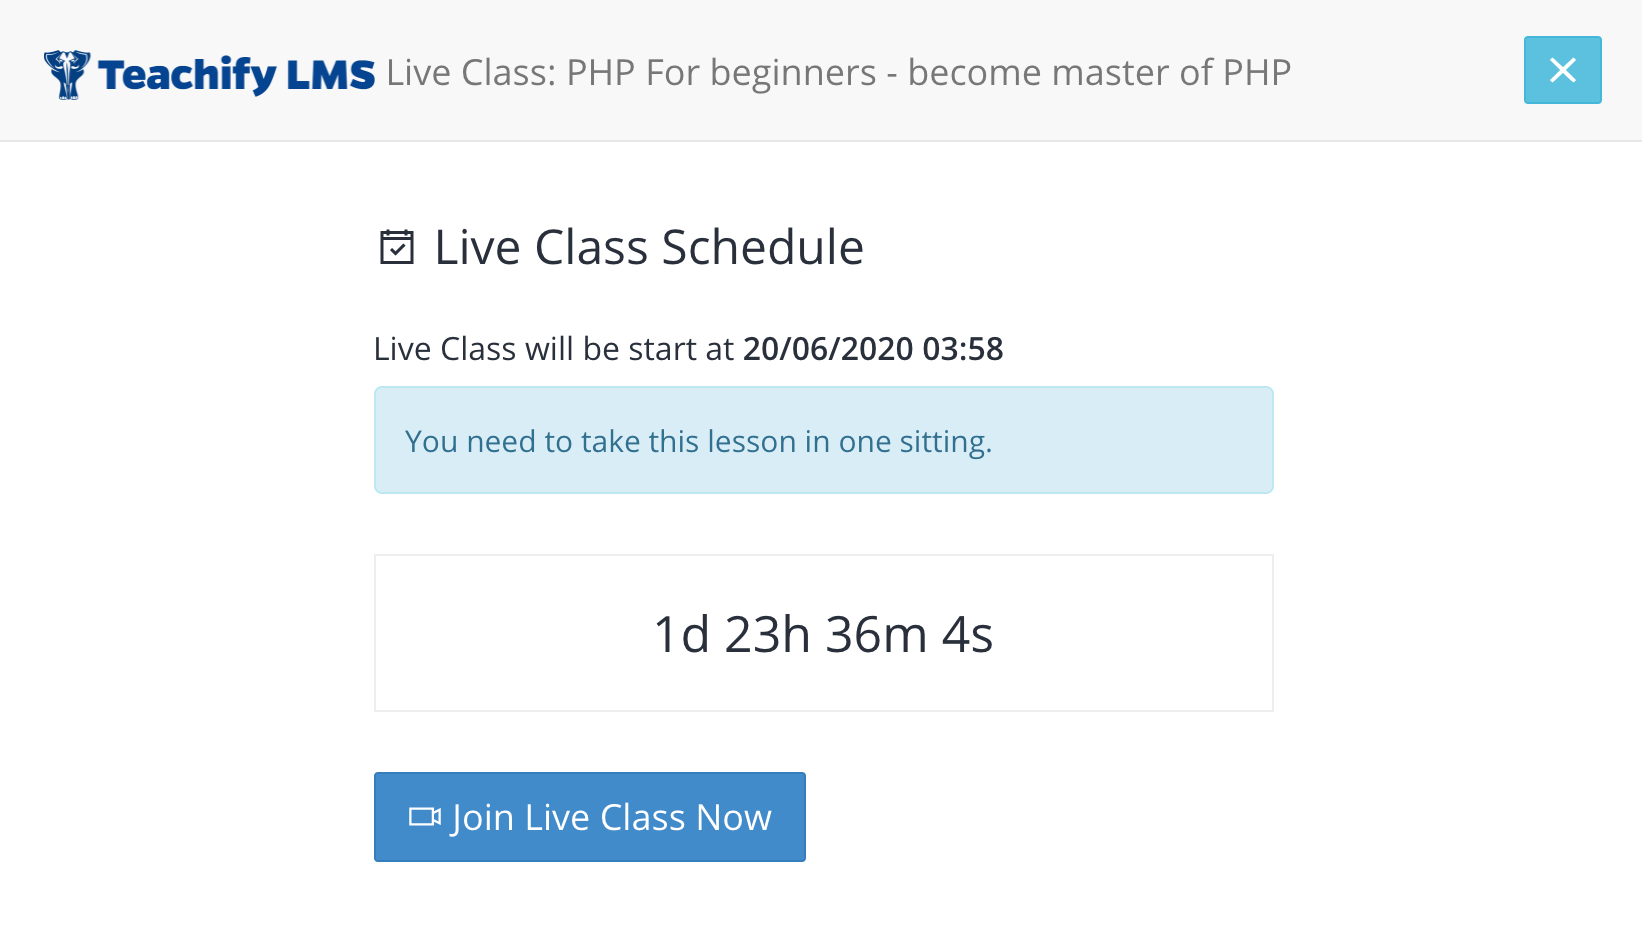
In the course playing page, a student will be able to join the live class by clicking the “join live video class” button
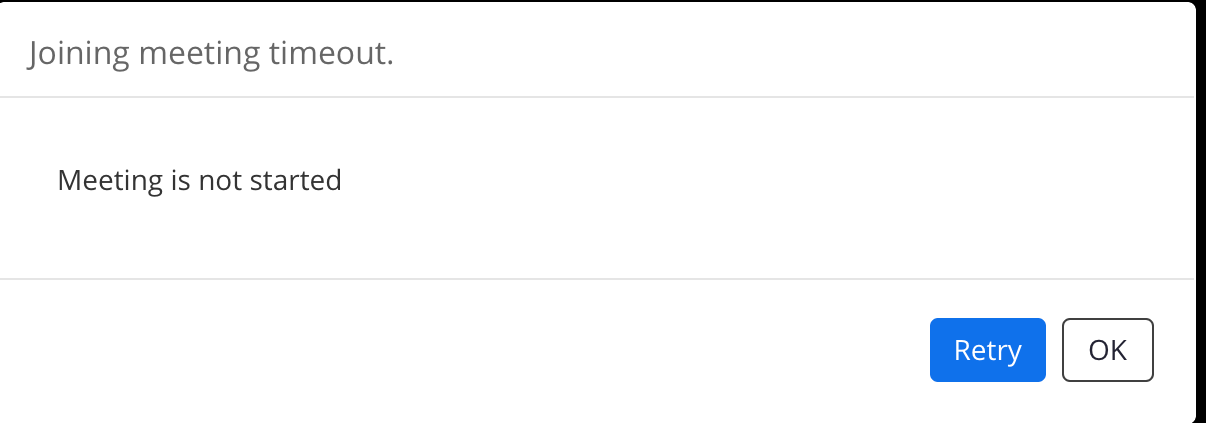
If any student attempts to join the class, but you (as the instructor) didn’t start the zoom meeting yet, the student will see this warning message.
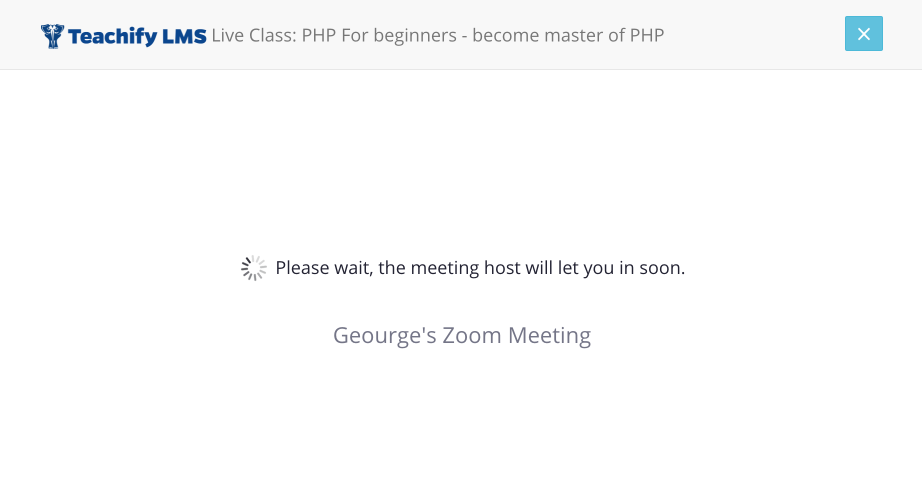
If you ( as the instructor ) have already started the zoom meeting and a student attempts to join the live class, the student will be waiting for your joining approval.
Now in your zoom app’s waiting room or participant list, you will see your student is awaiting your confirmation.
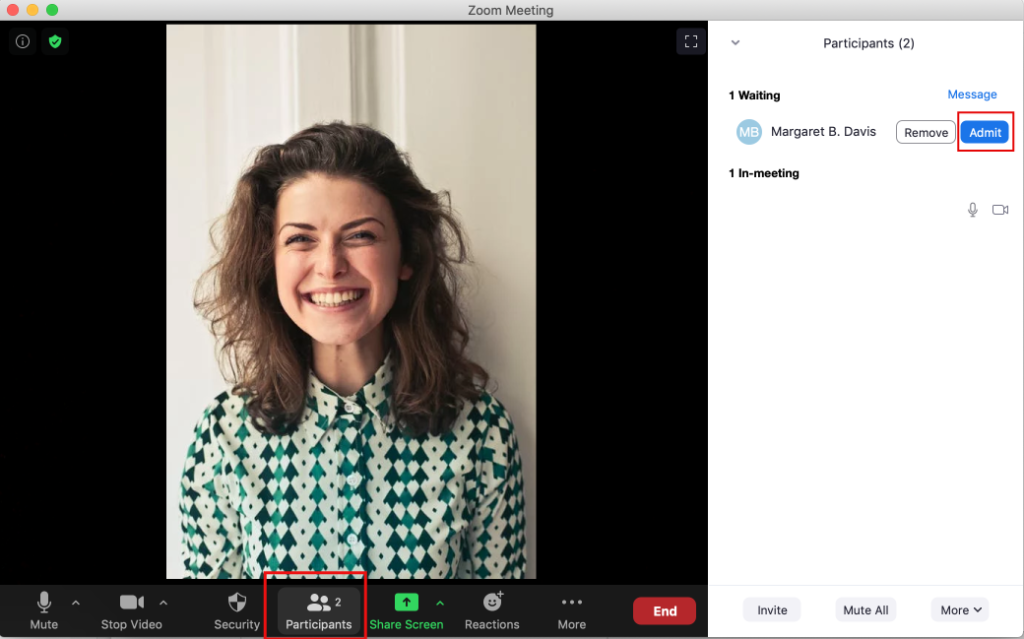
By clicking the Admit button from the participant’s lists, you are allowing your students to join the live class.
Enjoy!