Teachify LMS installation process is extremely easy. With just a few clicks, you’ll get a fully functioning learning management system. Before attempt to install, we recommend watching a short video about Teachify LMS installation https://www.youtube.com/watch?v=tJaH8Z_FbKQ
Teachify LMS has a few system requirements. Your server must needs to require below requirements in order to run it smoothly. Please check the server requirements below
- PHP >= 7.1.3
- OpenSSL PHP Extension
- PDO PHP Extension
- Mbstring PHP Extension
- Tokenizer PHP Extension
- XML PHP Extension
- Ctype PHP Extension
- JSON PHP Extension
- Fileinfo PHP Extension
After meets your server above requirements, you are ready to install it. You can install Teachify LMS in two way.
- Using Installation Wizard
- Manual Installation
Using Installation Wizard
we recommend to install using installation wizard
After unzip Teachify LMS package file, navigate to it from the browser. You should see an installation wizard showing you the server requirements checklist
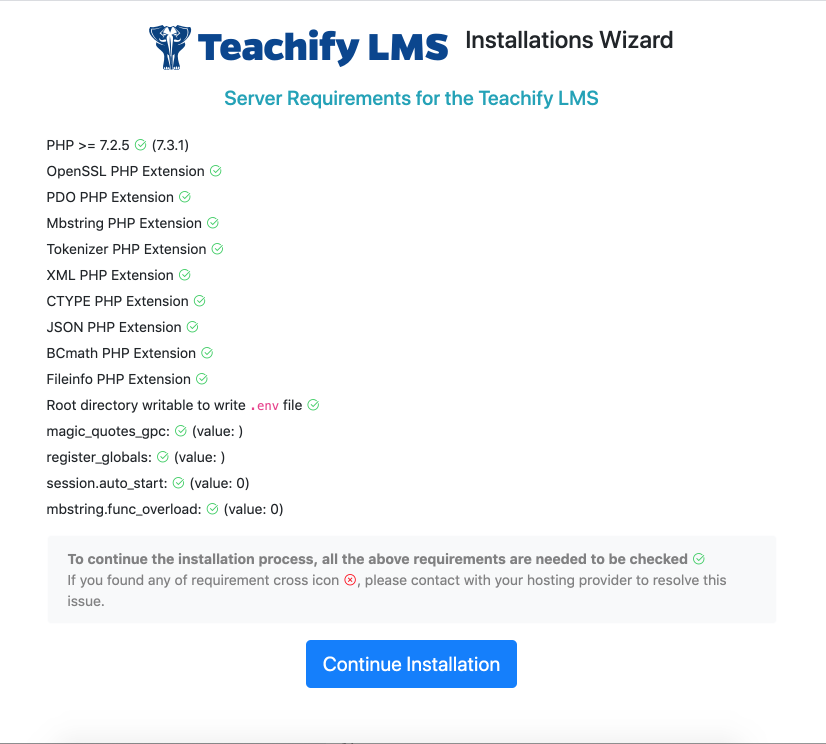
You need to make sure that all checklist showing you Ok sign in circle with green color, if you see any cross in read circle, contact with your hosting provider, and fix those issues soon.
Now you need to click continue installation button to go to the next process where you need to provide your database information.
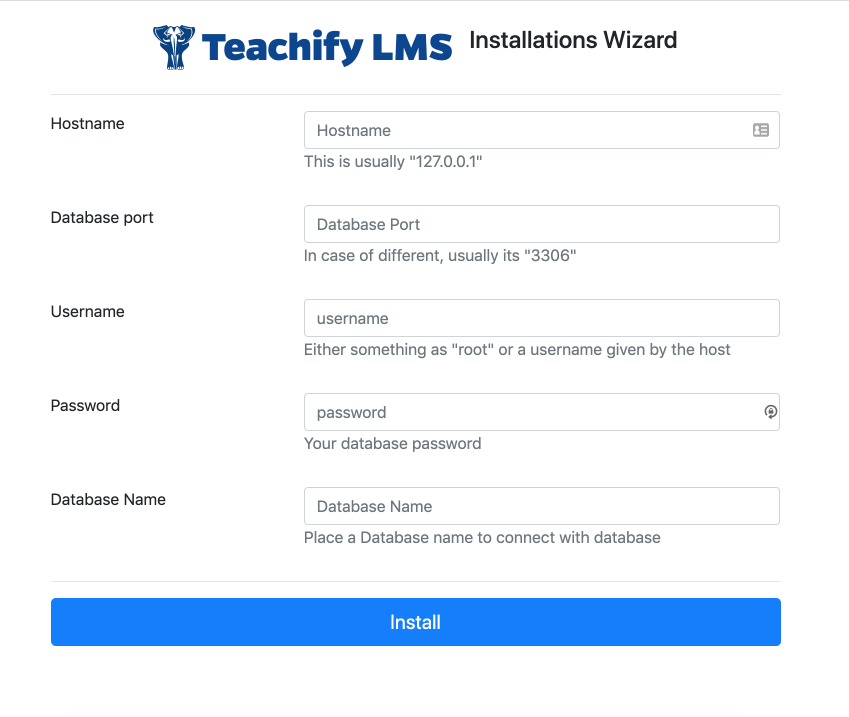
Place hostname, port, username, username password and database name. You don’t need to create a database, Teachify LMS is smart enough and it will create a database by your given name. After place necessary database info, click install button
Provide a unique database name, if Teachify LMS found database name matched with any existing name, then all previous database data will be erased and teachify LMS create its own table within that database.
If everything is fine and your server meets all requirements. The installations should complete within few seconds. After successful installation, you will see confirmation screen like below.
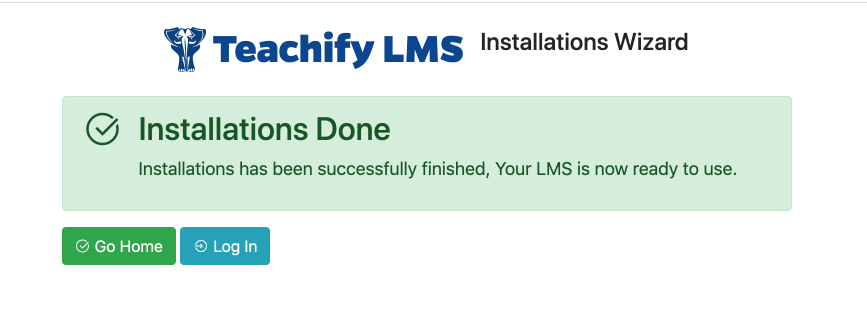
Your application has been successfully installed to your server, now you can go home or go log in screen by clicking buttons.
Manual Installation
If you face any unknown issues, you can try to install manually
First of all, you need to unzip Teachify LMS package which comes within a zip file. Follow below instruction step by step to complete installation.
- Upload the source directory and files to your server. Normally the root>source>index.php file will be at your root.
- Copy
.env.examplefile from your root directory and rename it to.env - For database settings, open the .env file which you just created by copy, with a text editor, and set your database config.
- Set DB_DATABASE, DB_USERNAME, DB_PASSWORD to
.envfile - Note: .env is a hidden file, you can see it by opening directory to a text editor or FTP client software
- Import demo database, demo database located at root>source>database > teachify-lms.sql